Source: Read More Author:
When you’re done playing with the Double Tap gesture on Apple Watch, take time to learn about the new features included within the Compass app on the device in watchOS 10.These are designed to build on and expand from its strengths and should be of particular use for those who enjoy the great outdoors. They include new tools to find strong cellular connectivity, waypoint elevation in more.
Learn how to use the new and existing features of the Compass app on your Apple Watch.
“The Compass app shows the direction your Apple Watch SE or Apple Watch Series 5 or later is facing, as well as your current location and elevation. On Apple Watch SE and Apple Watch Series 6 and later, you can create Compass Waypoints and then find the distance and direction between them, be alerted when you’ve exceeded a particular elevation, see an estimate of the point where your Apple Watch was last able to establish a cellular connection or make an SOS call, use Backtrack to retrace your steps, and more.”
Open and use the Compass app
There are three primary ways to open the app: Ask Siri to open it, press the Digital Crown to open the Homes screen and tap the icon there, or when using List view tap the listing name. If you’ve recently used the Compass app, you should see it listed in the recently used apps selection that appears when you double tap the Digital Crown.
When in the compass view the dash at the top of the dial shows your current direction (bearing). Line up with North to figure out what’s South, East, West, and North, of your position.
By default, the compass uses magnetic north, but you can change this tore north in Settings>Compass>Use True North.
The five Compass views
In the app you’ll see which direction you are heading measured in degrees. These are measured clockwise from the North.
There are in fact five Compass views which you access by turning the Digital Crown while in Compass view:
Face view:
Your bearing is shown at the center with waypoints shown in the inner ring.
Compass view:
A large compass arrow with your heading below and a direction arrow to show you towards North (or True North if set to that).
Complex:
Your incline, elevation, and coordinates in the inner ring of the compass. Your bearing is represented in the outer ring. Nearby waypoints are shown in the center.
Waypoints:
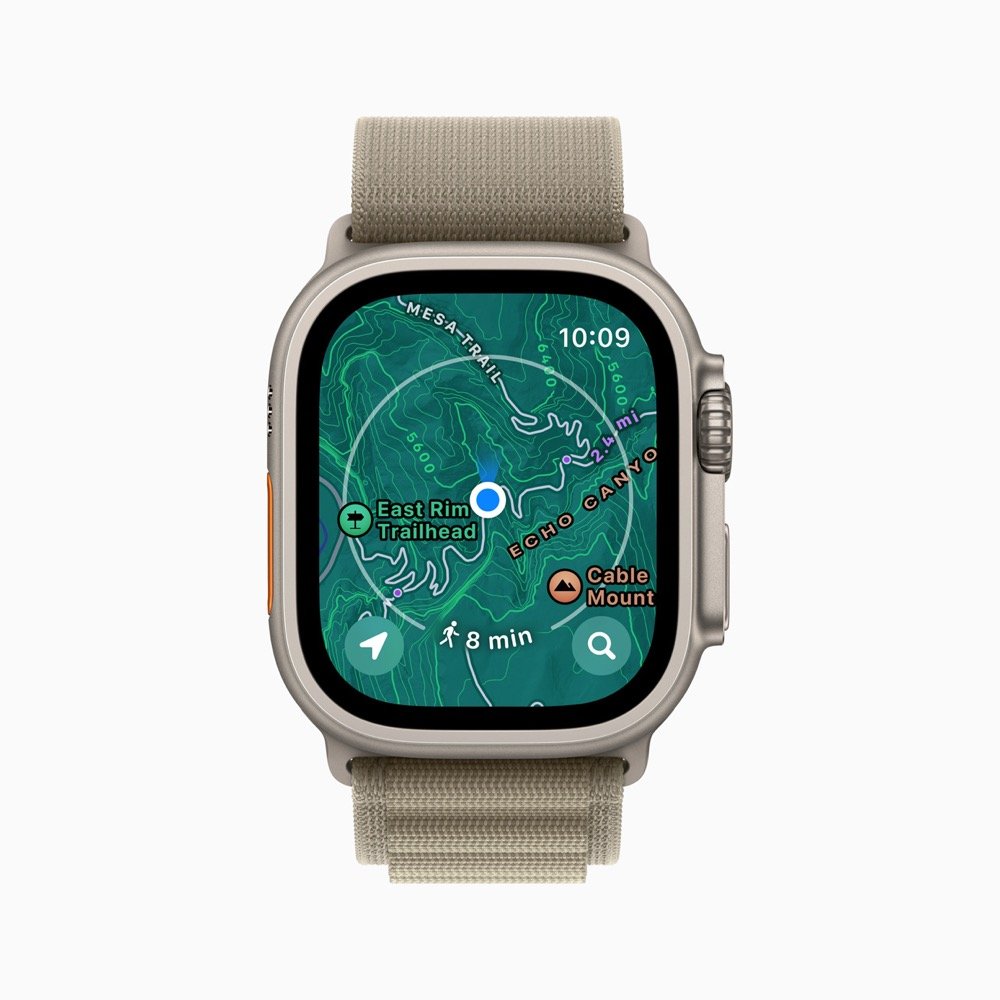
This shows your waypoints, including your car parking points and the last location where your watch or iPhone could make a cellular connection. This also includes the availability of Emergency SOS. In addition, locations that you save in Guides in the Maps app will automatically be made available as points of interest. Elevation data for waypoints is now available along with Elevation Alerts. Tap a waypoint to gain access to a list of those points so you can select the relevant item and set a bearing to that place.
Also read: 10+ things you may have missed in Apple’s iPhone 15 event
Elevation:
Screens that have a compass dial also have an Elevation button at the bottom of the display. This is depicted by twin mountains. Tap this to see a 3D view of your waypoint elevations relative to where you are. This makes use of data from the altimeter on Apple Watch.
How to set a bearing
If you want to head in a specific direction (bearing) you can set this in the Compass.
Tap the small I button in the top left of the compass face and scroll down to the section marked Bearing.
Tap this and you can set the direction in which you wish to travel by turning the Digital Crown in the direction.
Tap Done and the bearing will appear underneath your current bearing, the idea is that as you travel you can use this information to keep you moving in more or less the right direction.
You can now set an Elevation Alert to notify you when you have passed a particular elevation threshold. This can be useful when planning breaks along a hike.
The new Waypoints explained.
Last Cellular Connection Waypoint
This indicates the last place you had reception with your carrier if you ever need to check your messages or make a call to your family.
Last Emergency Call Availability Waypoint
In the case of an emergency, this shows you where on your route you can make an emergency call using any available carrier’s network.
Point of Interest Waypoint.
Points of interest (POI) you have saved in Guides in Maps that are within 50 miles of your current location are made visible here.
Download a Map to use offline
If you intend using Apple Watch to navigate your journey it makes sense to use the new ability to download Maps of the area in which you are going to be for offline use. To do so:
Open Maps on iPhone.
Select the area you intend to explore.
Tap the Download button.
The map will now be available on your Watch when your iPhone is within Bluetooth range.
Apple also makes a handy guide to using Compass on Apple Watch available. You can download it here.
Please follow me on Mastodon, or join me in the AppleHolic’s bar & grill and Apple Discussions groups on MeWe.
Dear reader, this is just to let you know that as an Amazon Associate I earn from qualifying purchases.


